Lightroom for iPad Pro
I couldn’t find any videos on how to sync Lightroom CC and Lightroom Classic in less than 50 steps, so I set out to create my own workflow.
What I Wanted
For me, the iPad Pro is an accessory to my main workflow, something I can simply integrate into what I already do. Its biggest appeal to me as a tool is its improved screen and Reference Mode, as well as its relative portability compared to something like a laptop with permanently attached keyboard.
My workflow has always been the following:
File management in Finder
Import into Lightroom Classic
Cull
Edit
Export
Backup
Even though I am introducing the iPad into the workflow, these essential steps should not change drastically. I also wanted something that offers flexibility—that is, I should be able to move seamlessly back and forth between my main computer and the iPad.
The Result
After playing around in Adobe Lightroom Classic for desktop and Adobe Lightroom for iPad, I have landed on this workflow:
File management in Finder (desktop)
Importing into Lightroom Classic (desktop)
Cull (desktop or iPad)
Sync to Creative Cloud
Edit (desktop or iPad)
Export (desktop)
Backup (desktop)
Looks very similar, doesn’t it? I have bolded ‘or’ because this is the main appeal of this workflow. I am able to switch between desktop and iPad as I want, and all edits and image ratings will remain.
Step-by-Step
1) File Management
For file management, I simply follow the same folder structure I do for any other project. I have the main parent folder, then organize assets and exports into subfolders. Whatever you normally do, this part of the workflow can remain the same.
2) Importing into Lightroom
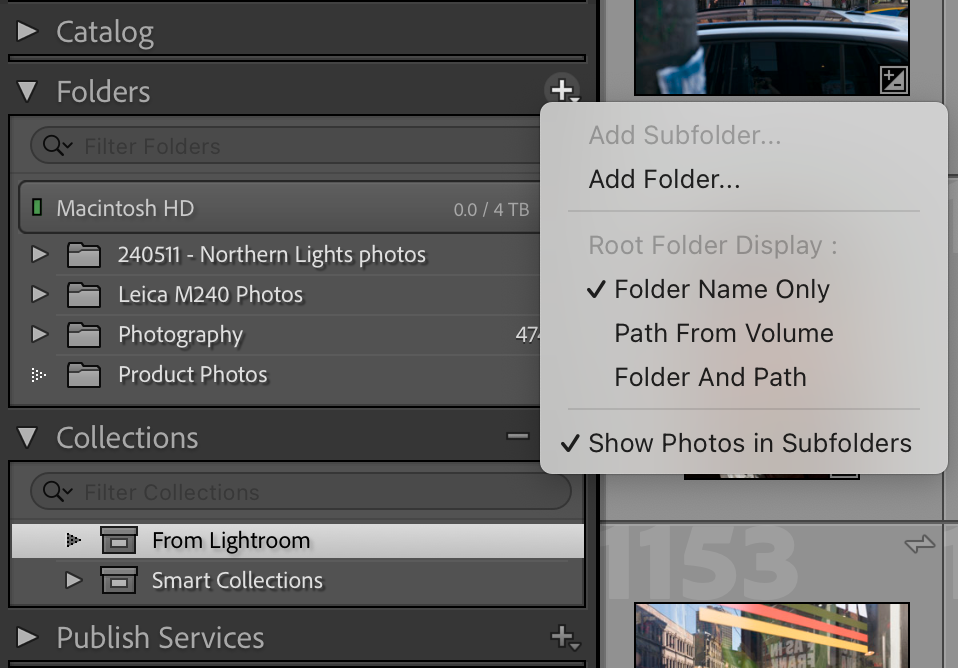
This process is also unchanged; just do what you normally do. I simply click on the + icon, Add Folder, and so on and so forth.
3) Cull
At this point, I typically do a first-pass, using the Reject feature in Lightroom Classic, or rating images I intend to edit as 1 star. I then delete the rejected or unrated photos. I try to carry this out in Lightroom Classic to save time on the next step, syncing.
4) Sync to Creative Cloud
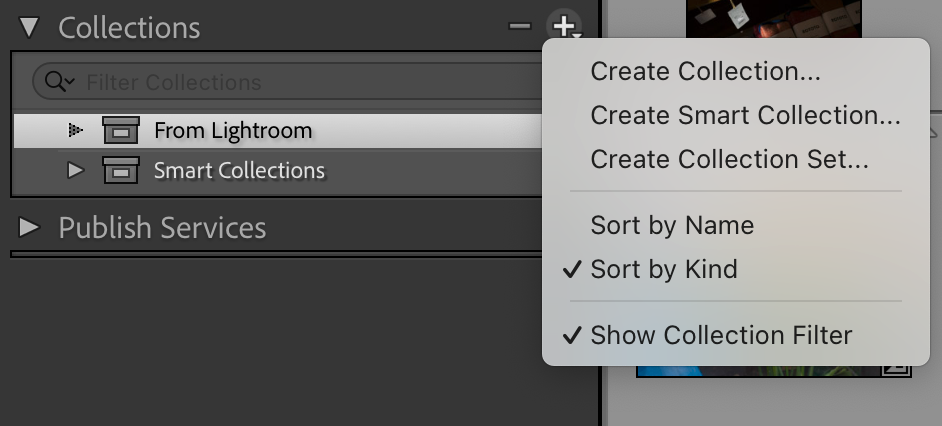
To sync to Lightroom for iPad, I go to the Collections tab in Lightroom Classic, click on “Create Collection,” create the collection under “From Lightroom,” and rename the Collection to be the same name as the folder I want to sync. The renaming might not be a necessary step, but it also helps me keep track of what I have synced.
I then select all the photos in the folder I have culled through, then drag and drop them into the Collection I just created. This will begin the syncing process, sending the images to Creative Cloud. You should notice now that whatever edits you make in the original Folder will sync automatically to the Collection.
Once synced, open up Lightroom on the iPad and allow all images to sync. The length of this process will vary depending on your wi-fi speed and the number of images. I usually do this step at home, where I know the wi-fi is very fast. Once synced, any edits you make on the iPad will sync back to both the original Folder and Collection in Lightroom Classic on the desktop, and vice versa.
5) Edit
Now you should be able to edit as you please, editing on the iPad when you feel like it, and then returning to the desktop. The only slight inconvenience and thing to be mindful of is to allow all edits to sync when you first open Lightroom Classic or Lightroom for iPad. If you begin editing before all your edits have had a chance to sync, it may overwrite your edits and you will lose all that work.
6) Export & 7) Backup
Like the first 2 steps, I just keep these steps to the desktop and follow whatever workflow I have already established.
And that’s it! A simple workflow that allows you to integrate the iPad into your Lightroom workflow. I find editing on the iPad Pro 13” M4 base model to be refreshing. The ability to use your finger or stylus creates a different experience and I thoroughly enjoy lounging in bed while editing photos. I am able to take advantage of the large screen and the better display compared to my subpar desktop monitor.
If you would like more visuals, I recommend watching the video at the beginning of this post.
Cheers,
Joon

